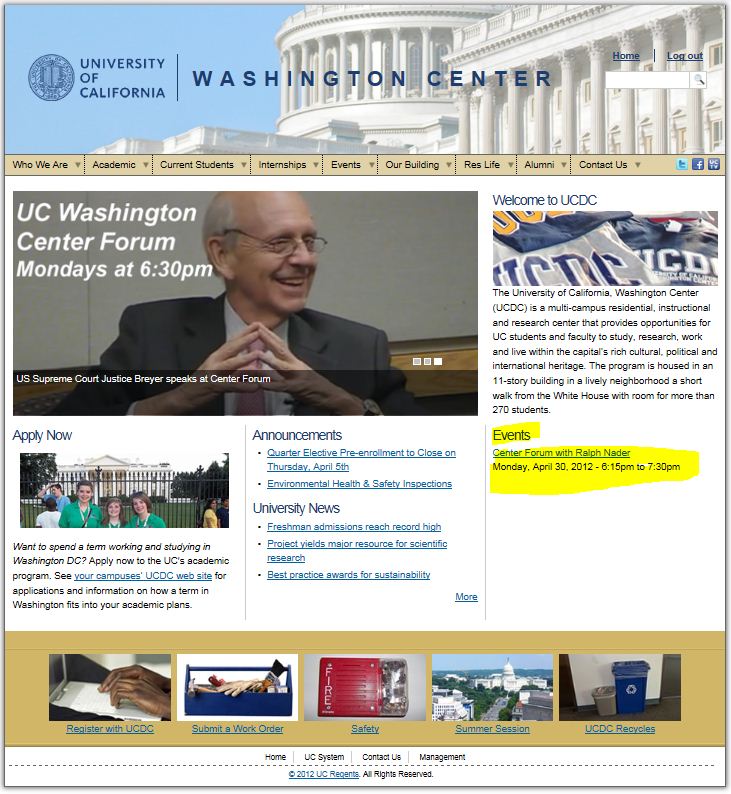
An Event is a brief description of a time specific activity or occurence. Published events are associated with the Events block on the web site home page. The Events block displays a title link to the specific event page. Events are also displayed on the Center-wide calendar of events under appropriate date and time.
- After choosing Events from the CREATE CONTENT tab you will see the Events template.
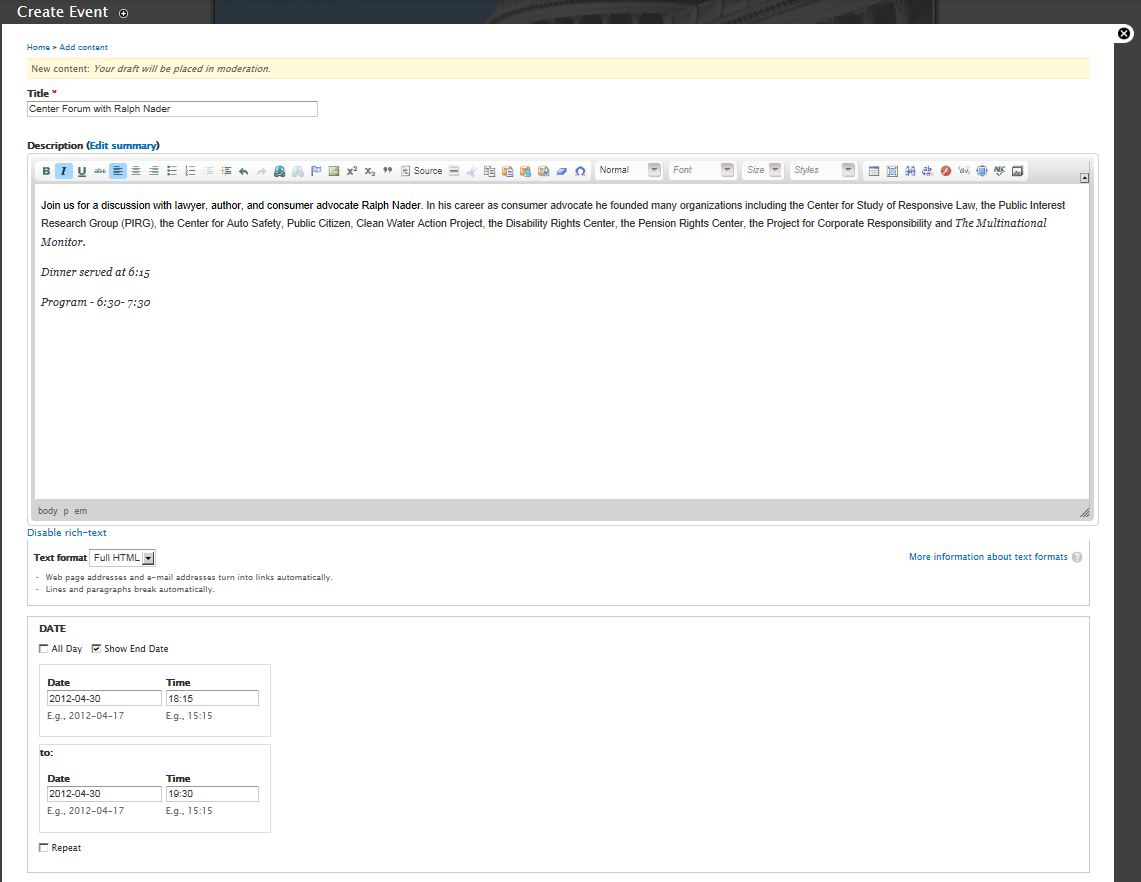
- Fill in the Title field. This will become the name of the page. It also becomes part of the URL for the page and the name of the link in the Events section on the home page.
- Type or paste text into the Description field. This will be the core content of the page. The palettes in the toolbar of the HTML editor should be similar to those in Microsoft Word. You can learn the function of each tool in the tool palette by hovering over the icon. Most tools relate to a specific editing or HTML function. The Source tool enables you to edit the actual HTML code. Use this feature with great care.
- TIP: If you copy text from another document to paste into the Body, use the Paste as plain text button. (It looks like a clipboard with a notepad.)
- You may want to add images within the body of the page. Here’s how.
- You may also want to link to other web pages within the web site, external URLs or to documents. Here's how.
- There is usually no reason to switch the Text format. Please leave it set to the default which is Full HTML.
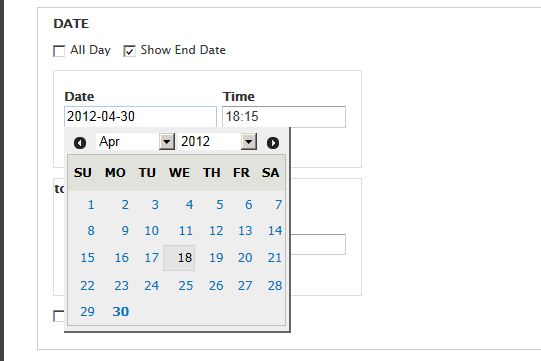
- Next is the DATE parameters for the Event. The default configuration has a single Date and Time field. Clicking in the Date field brings up a calendar. Click on the desired date within the calendar to enter it into the field.
The Event template uses a 24 hour clock for inputting time (for instance, 15:45 is 3:45 PM). You may expand date options by clicking on the appropriate checkbox.
- Clicking on the All Day checkbox will indicate that the event runs for the entire day.
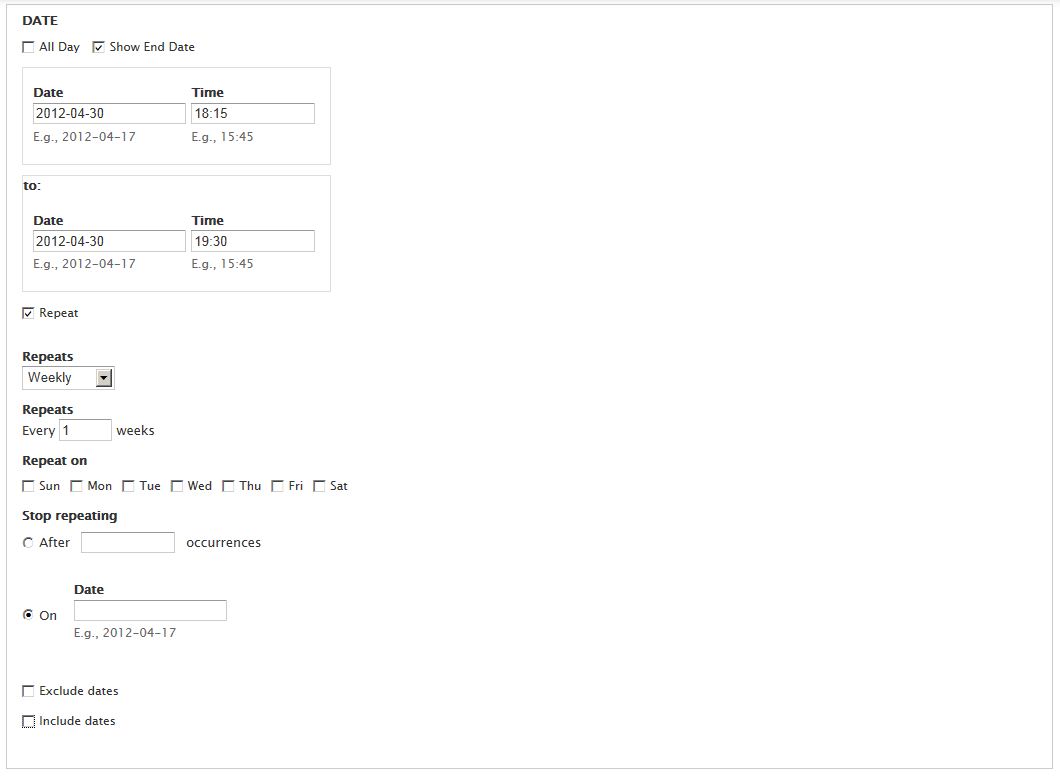
- The default is to display the start date and time for an event. Click on the Show End Date checkbox to display an end date and time. Set the end date and time in the same way that you set the start date and time. If the start and end time are within the same day, enter the end date with the same date. Then use the appropriate 24 hour time setting for the end time. (For example, an event on April 30, 2012 running from 6:15 PM to 7:30 PM will have a Start Date: 2012-04-30 and Start Time: 18:15 as well as an End Date: 2012-04-30 and End Time: 19:30.)
- If the event is recurring, click on the Repeat checkbox.
- You may then select from a pull down menu whether it repeats Daily, Weekly, Monthly or Yearly.
- You may also indicate the frequency of repeats. That is, every week, every other week, every three weeks and so on.
- Click on a day of the week under Repeat on if it repeats on a particular day of the week.
- Use Stop repeating to set an end date for the sequence. You can either choose to stop repeating the event after a specific number of occurrences or set to end on a specific date.
- Choose the Exclude dates checkbox, if you have a break in the sequence before it conclusion. For instance, an event is scheduled to occur every Monday for the next ten weeks except on the fourth Monday which is a holiday.
- Choose the Include dates checkbox, if you wish to include a date outside the sequence. For instance, an event is scheduled to occur every Monday for the next ten weeks. However in the sixth week you also will have a session on Wednesday.
- Once you have entered the Date information, move to the Section field. You must associate the event with a specific section in order to save the web page. There will be one or more sections to choose from. Please choose the one that seems the most appropriate to the content of the event.
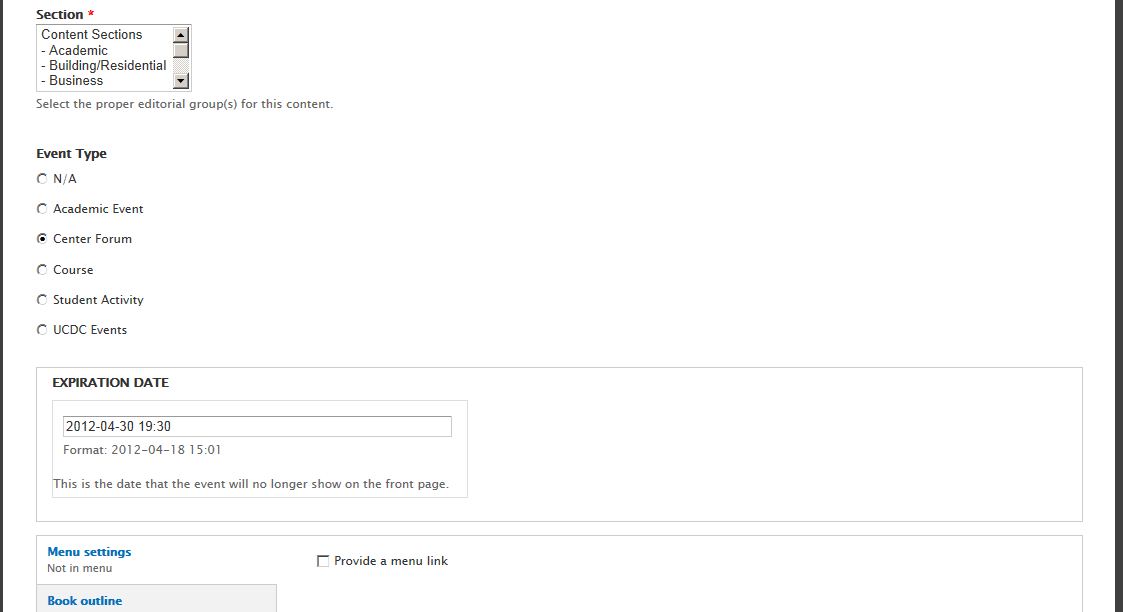
- Next assign an Event Type by clicking on the appropriate radio button. Pick the one that seems most appropriate.
- Use the EXPIRATION DATE to set a date and time for the event to automatically be removed from the Event block on the home page. Usually events should be set to expire shortly after they occur. For example, the event created above should probably expire just as it ends as after that time it is no longer relevant.
- At the bottom of the page you will see multiple vertical tabs. Please ignore these.
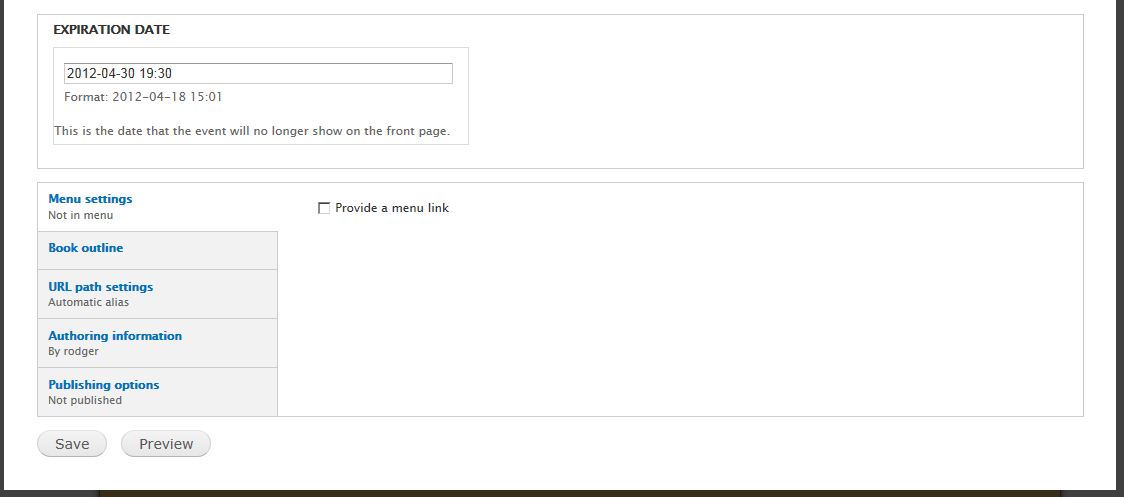
- Click the Save button to save the page. Depending on your status as a Content Creator or Publisher you may need to send this page to review or publish to the web site.
- Once published the event will be displayed in the Events block on the home page. It will also be displayed on the Center-wide events calendar. All events have a red header bar. All-day events have a blue background. Other events have a yellow background.